However, not everyone wants to use the built-in Snipping tool for some reason, such as they already use another screenshot capture tool or don’t use any. This means it’s best to disable or uninstall it totally. Here’s how you can do it. Also Read- How to Enable Dark Mode in Windows 11
1. Uninstall Snipping Tool
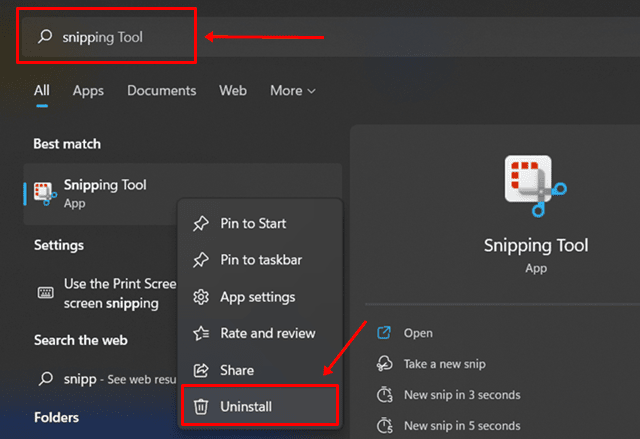
This is a very simple and easy method where you simply uninstall the snipping tool from your Windows 11-powered PCs. Here’s how it works.
- Uninstall Snipping Tool2. Disable Snipping Tool Using Registry Editor3. Disable Snipping Tool Using Group Policy EditorClosing Words
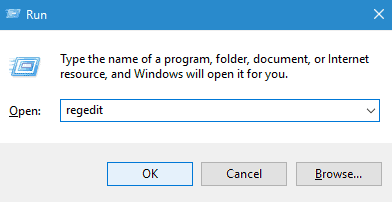
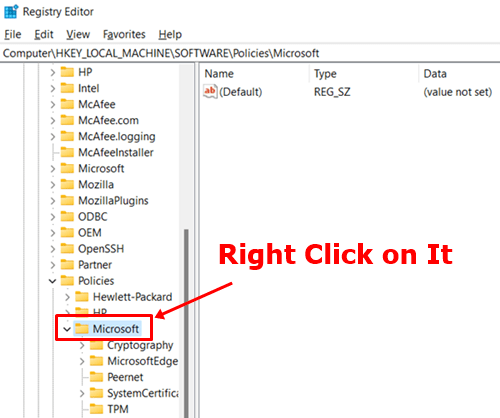
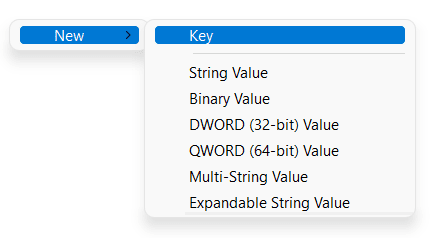
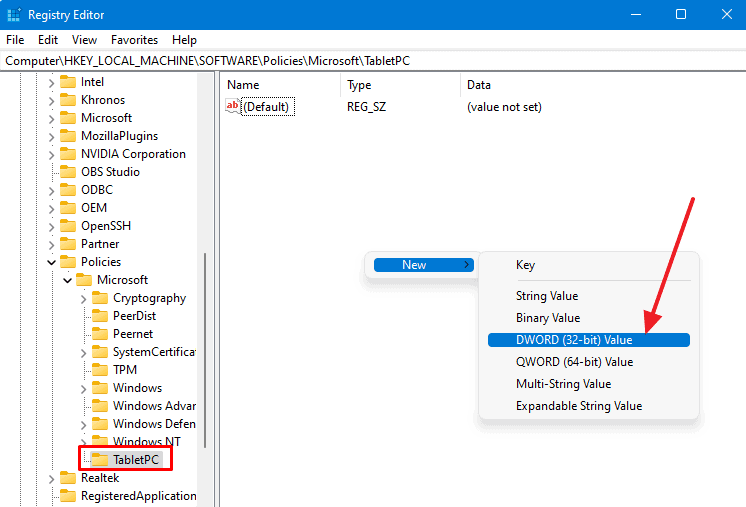
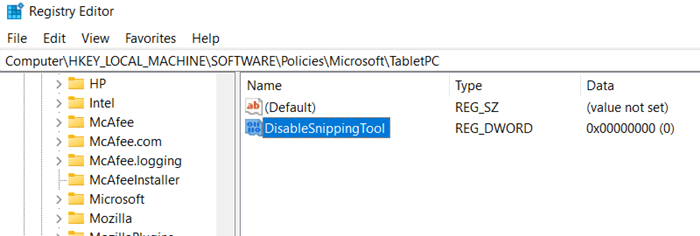
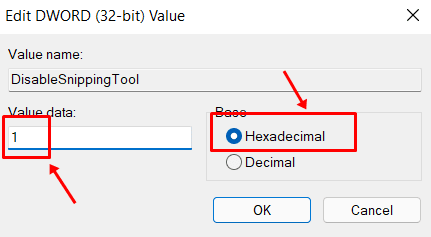
2. Disable Snipping Tool Using Registry Editor
This specific method lets you keep the Snipping Tool on your PC but in a disabled state unless you want to revive it. You will have to restart the PC and after that, Snipping Tool will be disabled temporarily until you enable it.
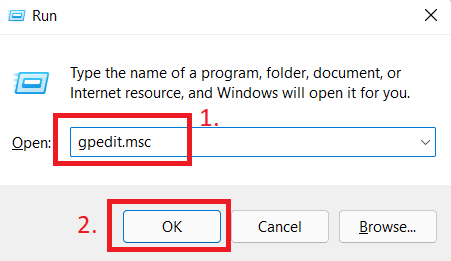
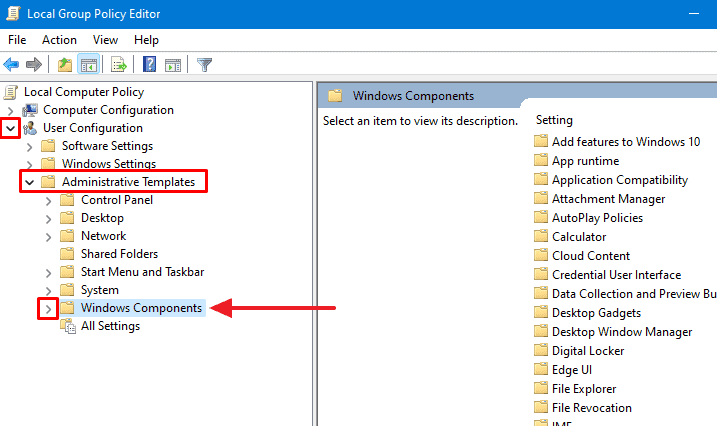
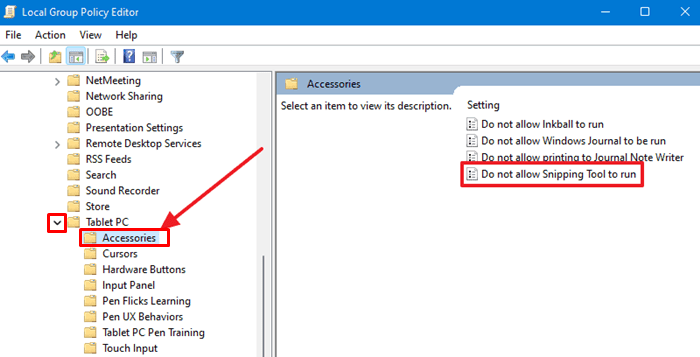
3. Disable Snipping Tool Using Group Policy Editor
This is another method that you can use to disable snipping tools on your Windows PC. Again, follow the instructions as mentioned.
Closing Words
And with that, I have wrapped out the guide on methods you can use to disable Snipping Tool on Windows 11. Of course, the reasons you could be disabling it can be different, but you should be able to get rid of it with the mentioned methods.